
TOTAL TIME: One Hour
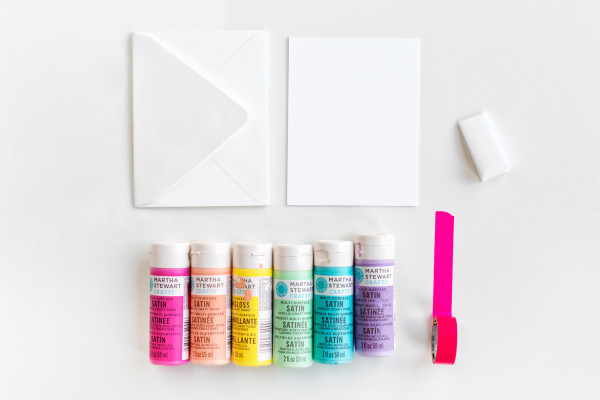
You’ll need:
High-Quality White Envelopes (Low quality tears too easily!)
High-Quality White Notecards
Craft Paint in Rainbow Colors
Makeup Sponges or Foam Brushes (One for each color, ideally!)
Washi Tape
T-Shirt
What to do:
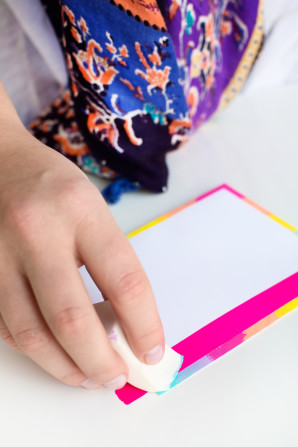
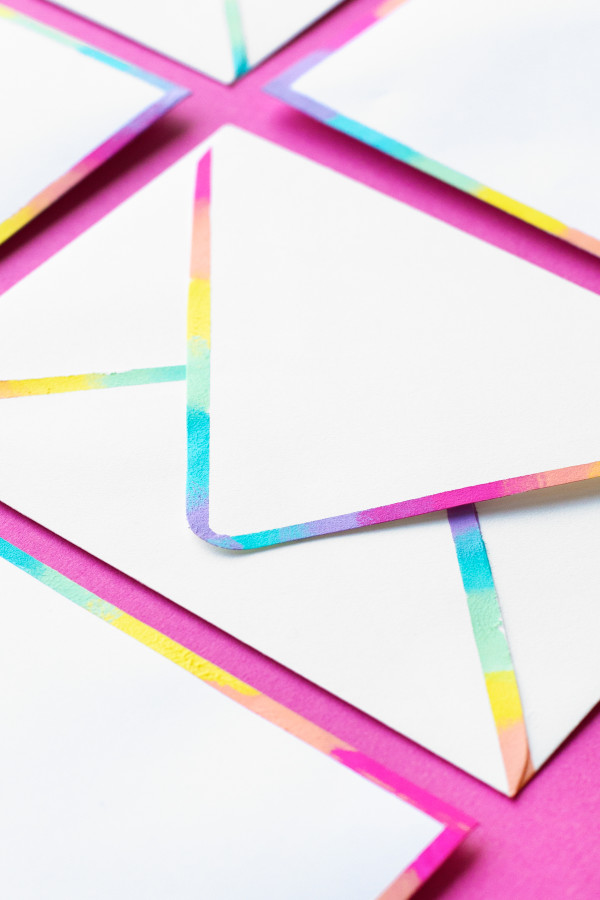
1. Washi tape is too sticky on it’s own to place directly on the envelopes, so you have to remove some of the sticky first. Do this by tearing off a piece and sticking it to a t-shirt several times.
2. Lightly place the piece of tape about 1/8″ from the edge of one side of the front of the envelopes.
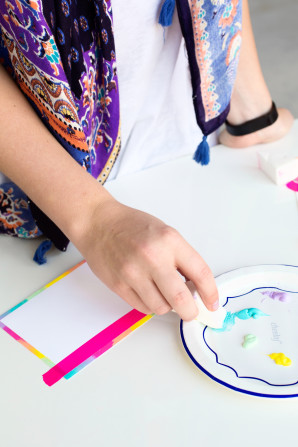
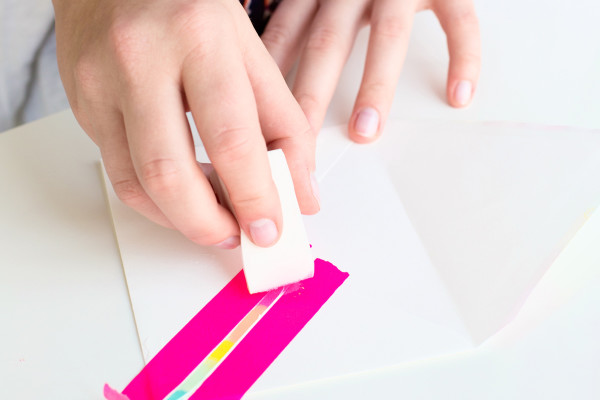
3. Dip a sponge into your first color and dab it over about a 1″ section of the exposed edge. Repeat this with the other colors, overlapping each one slightly so it blends.
4. Immediately remove the tape after you finish painting one edge. Do this slowly, so as to not rip the paper.
5. Repeat on the opposite edge and let dry completely, then complete the other two sides. Let dry again.
6. After the front is completely dry, it’s time to do the back! Follow the same steps above for doing the flap of the envelope. Let dry.
7. Then tape two pieces of tape about 1/8″ apart along the bottom diagonal lines on the back of the envelope. Sponge in-between the lines and let dry. Done!!
8. Use the same steps as the front of the envelope to do the notecards, if you want a complete set!
CREDITS : Studio DIY


Comments are closed.