")
This is my method of creating the currently on—trend fringed or streamer backdrop which has been taking Instagram by storm since last year! Back in 2015 we attempted the tissue paper version to create more of a hanging installation look. For this blog post, we have gone for a streamer backdrop DIY.
Need a streamer backdrop in Sydney? >> Contact Belle’s Decorations by Design
This one is also made of plastic. Whilst yes, it is not the best option, I am planning on using it for a few parties, and then using it as wall decor in my daughter’s room.
Some of the tips in here won’t apply to the paper ones, but I’ll try to keep it broad. Note, I can be somewhat lazy and messy with my DIY party projects at times, so I was rather impressed with this one.
What you’ll need for your streamer backdrop DIY
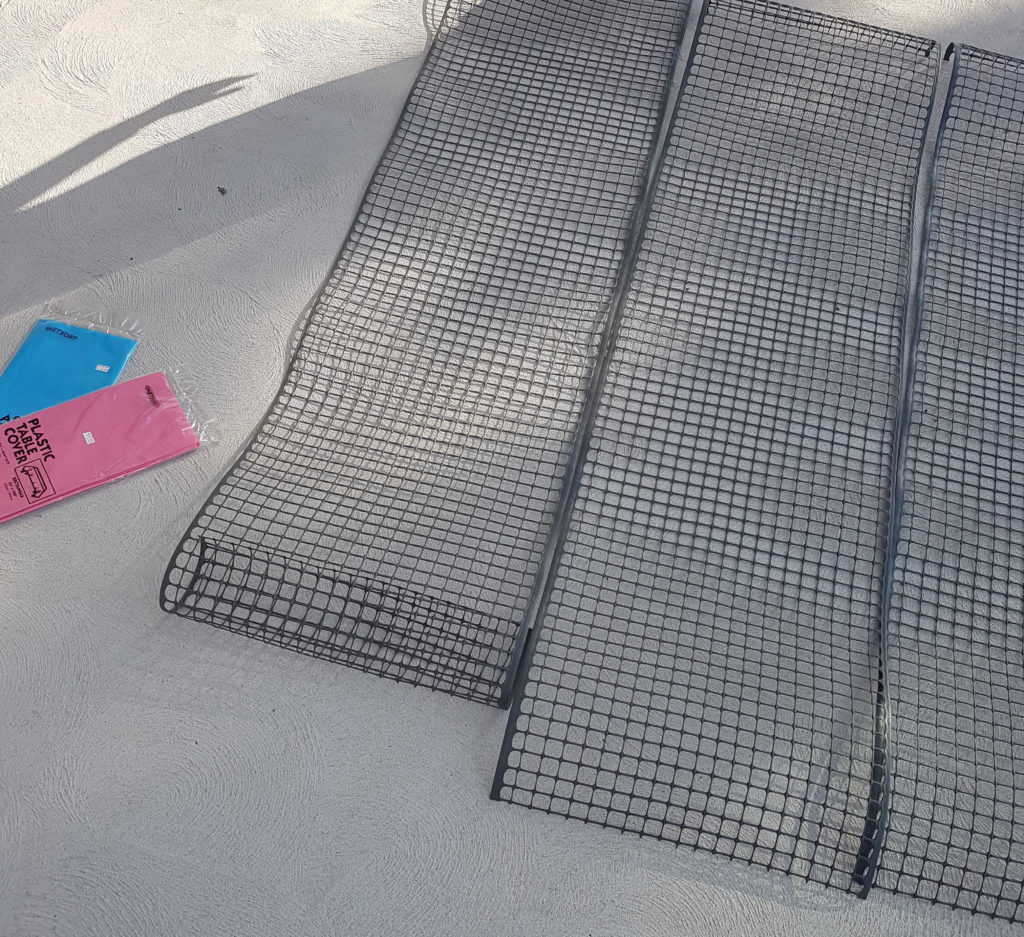
This yields a backdrop of 2m wide, with a 1-1.5m height
-
- 1 roll of lattice from Bunnings or gardening stores
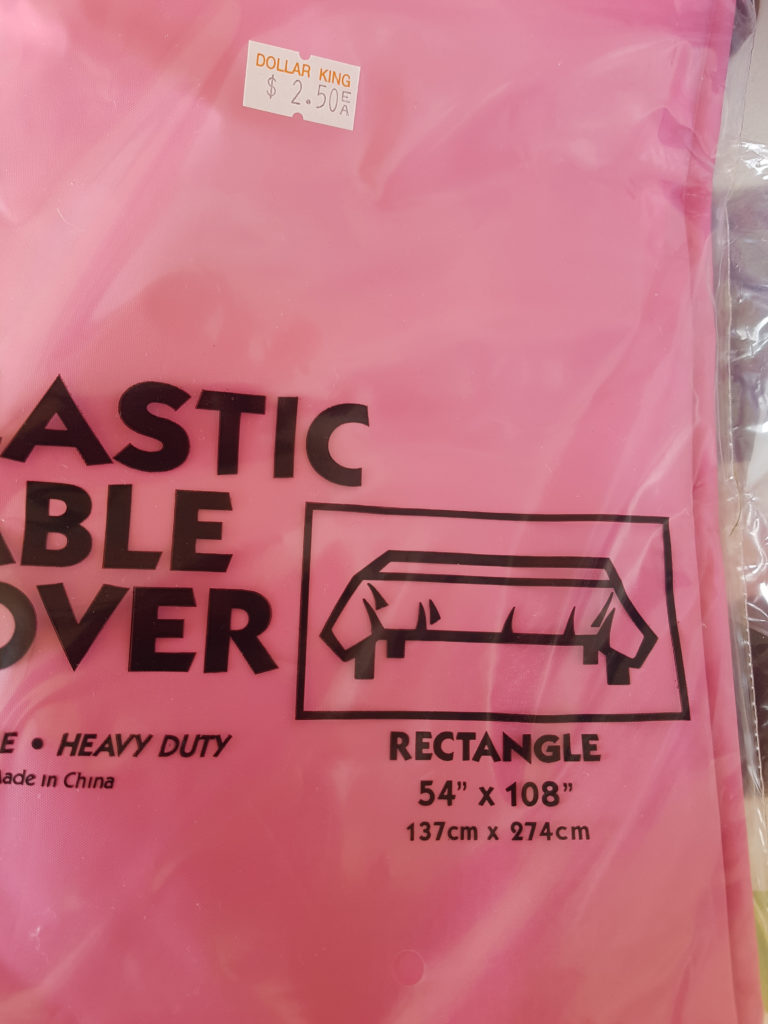
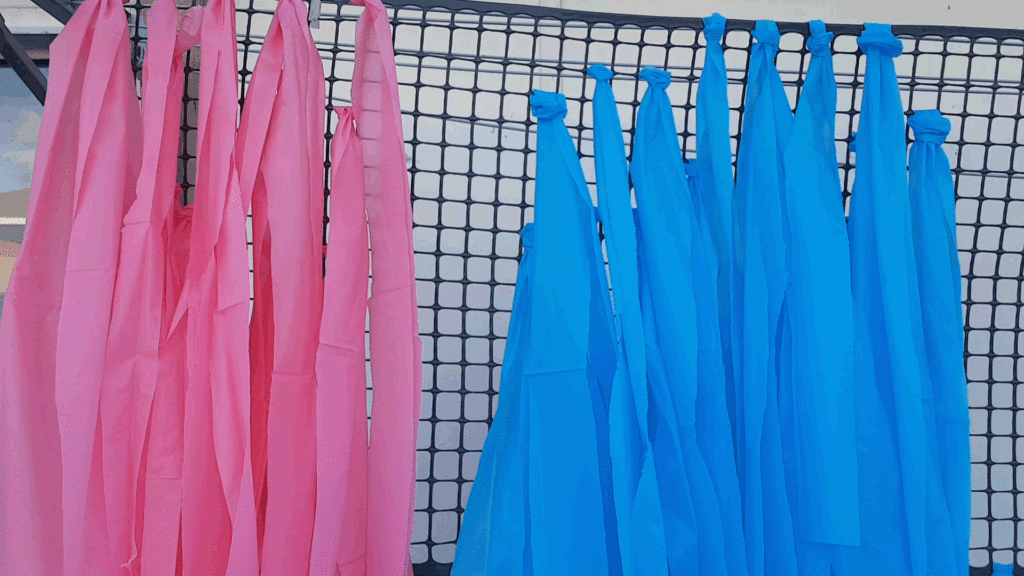
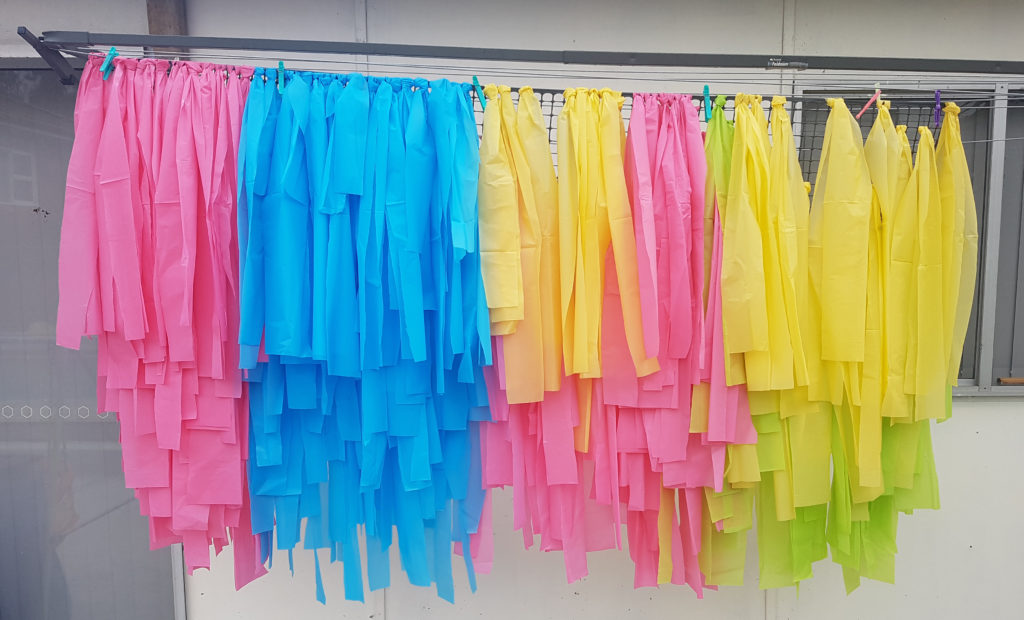
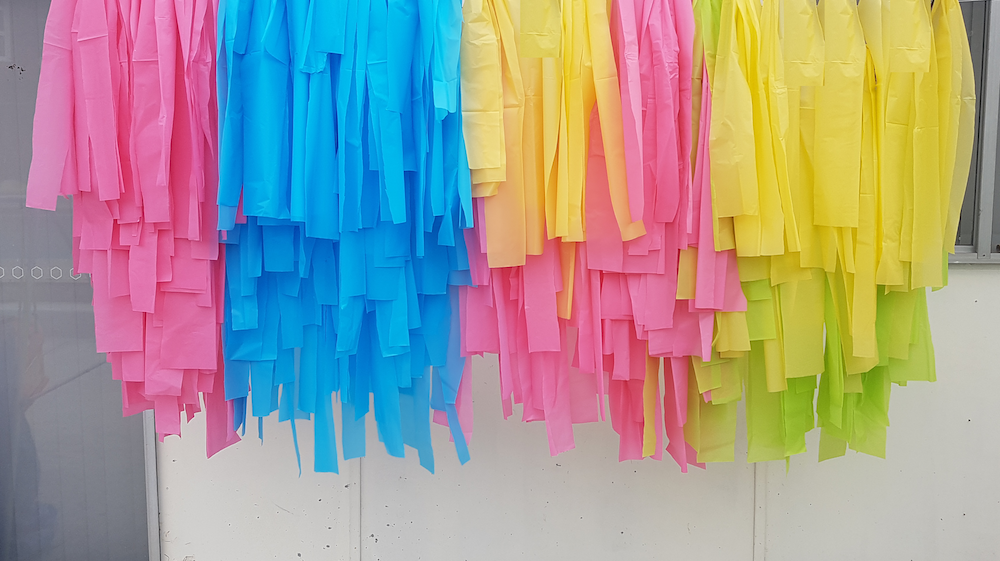
- Approx 6 -7 plastic party tablecloths, I used 7 in 4 colours
- Scissors
First steps – cut the lattice
Firstly, you’ll need to map out your project according to the amount of lattice you have.
Since my lattice was 6m long, I decided to cut it into 3 pieces of 2m each. The lattice was just under 1m high, but when the tablecloth was cut and layered on, it gave it some extra height. I believe two of these 2m pieces are enough to give you an impressive backdrop.
Since my plan was to make them into a wall, I am going to commission my dad to make me a square timber frame to hang it off. How to secure them would be a problem for another day lol, but I am thinking of fishing wire?
I wasn’t too fussed about colours, but this point would be a good time to think about how you will set them. Initially, I was going to colour block it, but as I got to the end and started running low, I mixed it up abit.
Surprisingly, I was able to cut the plastic with standard scissors, but make sure they are a sturdy pair. The lattice was way more flexible than I anticipated.
Next, (roughly) measure and cut your strips
I didn’t measure the tablecloth, as I was happy to go for a messy, layered look. I just opened it up, and folded it in half on the shorter edge (giving me a piece that was around 70cm high and 2.74m long), ensuring that after folding, it was just a little longer than the lattice pieces.


I then endeavoured to start cutting the strips. Being a left hander, cutting is one thing I am unco at, hence diminishing my DIY potential, lol. It was way easier than I thought.
For the second fold, I folded it in half on the long edge, sliced it, and lo and behold! It slid through like a knife in butter (talk about ASMR!). I put the two pieces on top of each other, folded in half and cut again.
With each cut, I laid each piece onto of the previous pieces until the strands became thinner and the chunk became too thick to slide through.
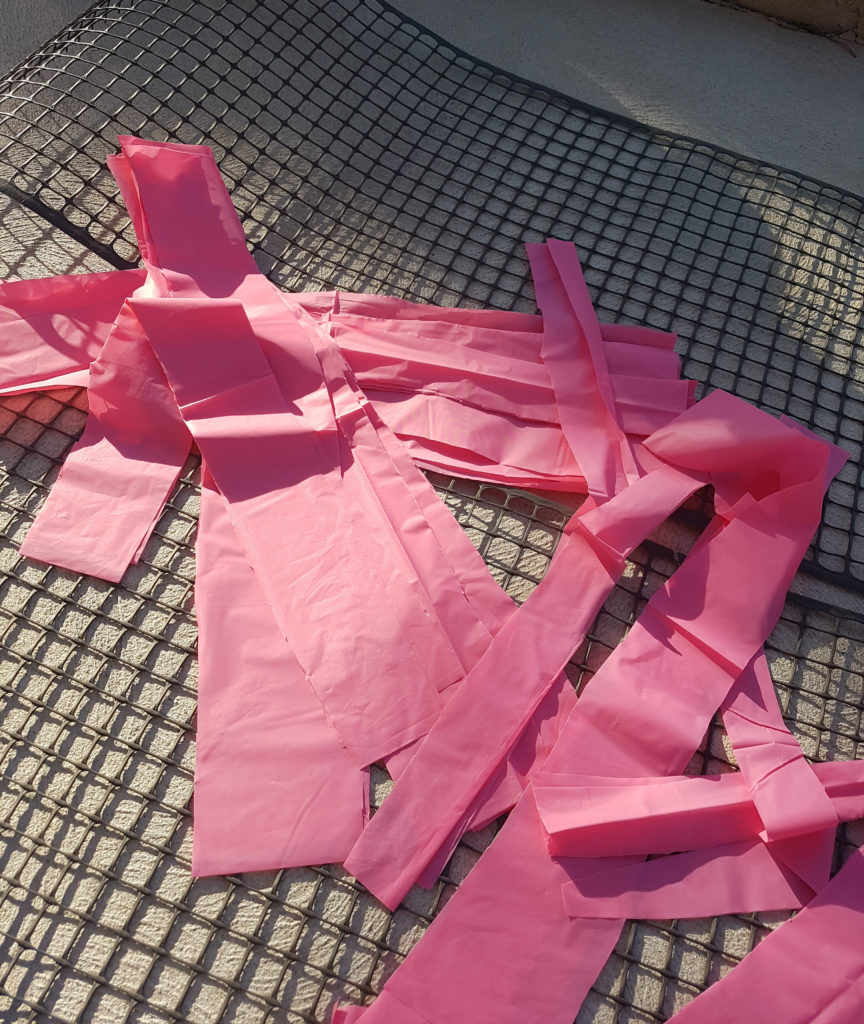
I wasn’t being precise though, so if you are a perfectionist, you might find a better cutting method.
I did try to keep the pieces to 7-10cm wide, 10 was the max I aimed for, I think is a good width. You can study a ruler to get an idea of how big that is.
TIP: Unless you’re working with several colours in one section, it’s better to cut one colour of tablecloth and weave it on before cutting the next, otherwise you will just have all these unruly pieces of plastic strip lying around.
Step 3, weaving
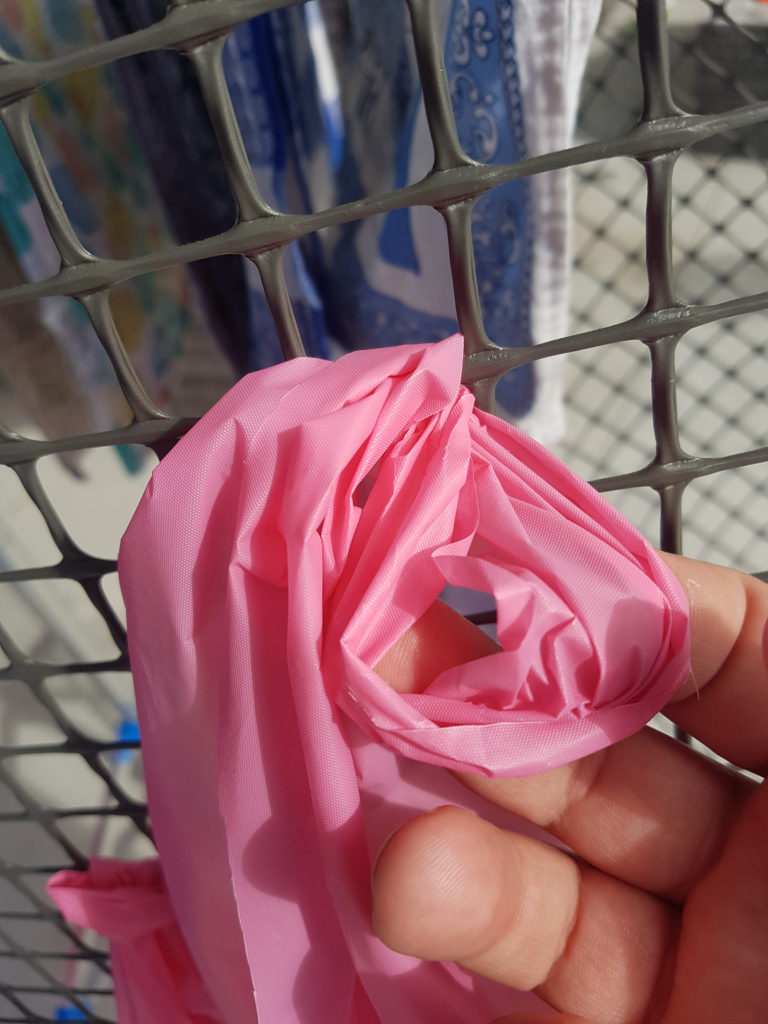
I started at the bottom as that was easier.
Each strip will already be folded in half. Grab the strip by the fold and wrap around a row in the lattice, grab the loose end and slot it in to secure it. You’ll need to take care here because if it snags, it will pull the plastic, creating a tear mark (you can’t really avoid them, but you can minimise them – they will most likely be concealed in the final version anyway).
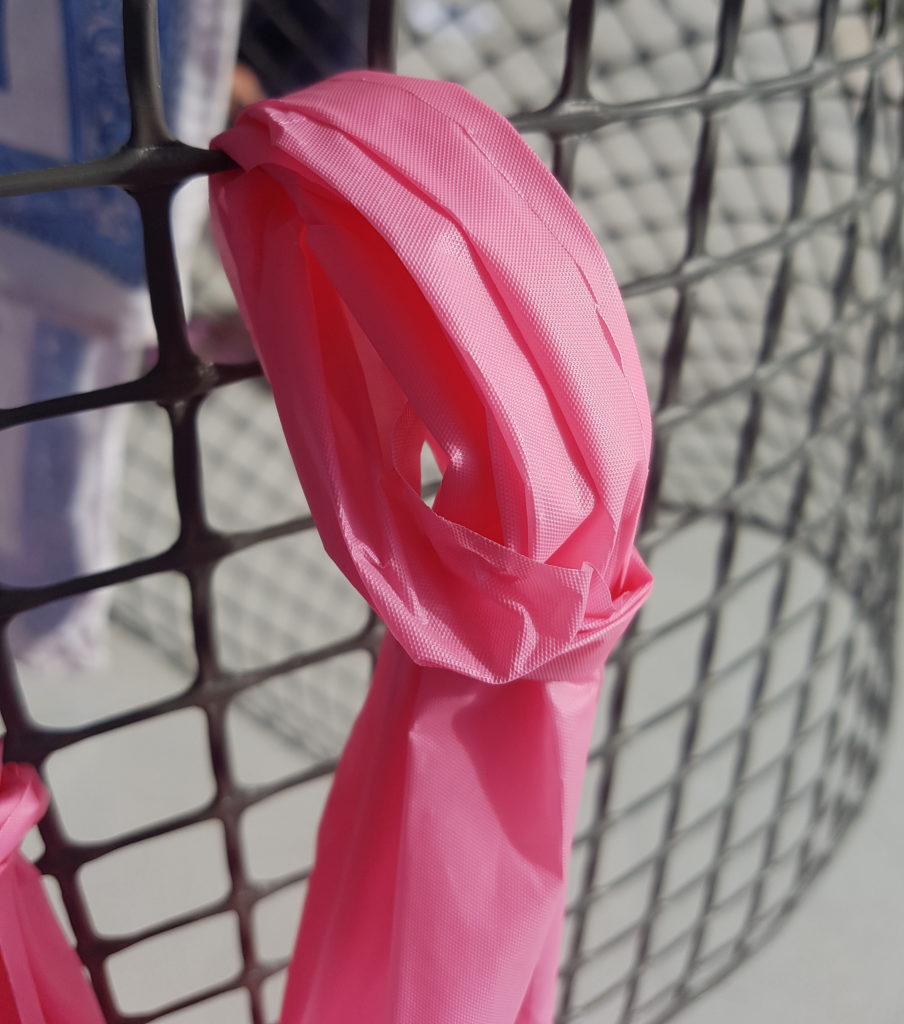

Initially I was weaving into every column and every second row, but I figured that would be way too “full’, so I started weaving a strand into every second column, and still kept every 5th or 6th row, but started each weave at a different point on the bottom, so as to keep it a little rough and not so straight. On the top row though, I did one on every column, so as to hide the lattice.
TIP: The lattice with the plastic is nowhere near as heavy as you’d imagine it might be, so you can hang it up on the clothesline whilst weaving – it’s a lifesaver!
How long did it take to complete the streamer backdrop DIY?
One tablecloth took 20 – 25 mins to complete, from fold and cut, to weave. So the 2m piece took around 2.5 hours. Initially, I thought 6 tablecloths would be enough, but after filling in the ‘gaps’, I realised you probably need around 7 tablecloths per 2 metres of lattice (unless you spread them out more than I did).
Because the strands are long, I feel like that with some balloons and other stuff around it, one 2m piece will be sufficient to make an impact. I think two together would make a huge statement too. Three? Now this would be a mega wall!
How can I display or install the backdrop at my party?
As I mentioned, I am going to get my dad to make me a timber frame. However, some other options which I think might work could be a clothes rack, the DIY frame hack using plumbing pipe or the easiest one, you can hire a frame from your local party stylist or prop hire place. It’s not heavy, so fishing wire should work well to secure it.
You can also hang these from the ceiling in a semi-flat position for a dramatic effect, but this option is highly dependant on your venue.
If you are having a party at home and have poles, you could achieve something like the below, but you’d need to keep the lattice length intact.
What’s the best way to store the streamer backdrop?
Roll it up! I secured it with pegs (so it doesn’t unroll) and put it in this camping storage thing that my husband had bought, but I think a big garbage bag will do the trick too.
I hope you enjoy this DIY! Feel free to tag us with #ConfettiDIY if you make this, we’d love to see it!
– Maria


Comments are closed.