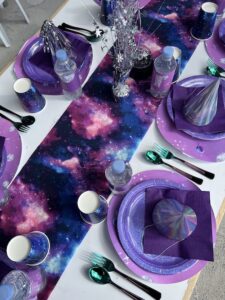
We recently held a spaced themed 7th birthday for a special little kid. Throwing together store-bought decor with custom items is one of our favourite ways to style a party! For this party, we thought we would make a sign loosely based on the invitation design.
Here was the invitation design:
We decided to try out the new Cricut Smart Stencil material to see how it would go. One of my favourite things about this material is that it does not require a mat (like all the Smart Cricut products)! Here are the steps we took to create the sign!
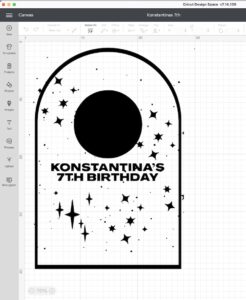
As I had the design in PDF format, it was very easy for me to recreate an arch in Cricut Design Space, and simply extract the text and stars as PDF to import into the Design Space.
The first thing I did was create the arch, which I was initially going to incorporate into the design, but then decided against as I was nervous about being able to line it up evenly on the board.
I found the arch in the ‘Shapes’ section, but it was a little long for my liking, so I dropped a square into the spot where I wanted to ‘cut’ it, and used the ‘slice’ tool to resize it.
VIDEO: Slicing an Arch Shape in Cricut Design Space
As I wanted the arch to be a border, and not filled in, I edited it to make it a thick lined border.
VIDEO: Converting a filled shape into an outlined shape
Finally, I added my custom elements in a .png format, which meant I didn’t need to erase the background in Design Space (I do love this feature though)!
For the board, we had an old white MDF board lying around. It was approximately 300mm x 450mm), so the final design including the arch was sized at 270mm x 400mm. We painted the background purple in keeping with our theme
We actually painted it using wall paint so it was nice and even after one coat. It did need just a little touch up though.
After cutting and weeding, we peeled the stencil from the liner and stuck it down to the board. We individually picked up the insides of the letters O, A, B and D with tweezers and stuck them down manually, but a better way to do this is to just use the light grip transfer tape.
The sheet stuck down very well to the board, we used our hands to ensure it was nicely adhered. You can also use a scraper or a brayer if you need to.
For the painting of the letters, stars and sun, we used the Kadink poster paint from Officeworks as we wanted the painted texture to be obvious, especially on the sun. We gave it a couple of coats. These paints are also great value!
We let it dry for an hour before peeling. We love how it turned out!


Comments are closed.