This cookie recipe has been contributed by Sally from The Party Project. Make sure you follow her Instagram account for the coolest cookies and party related stuff!
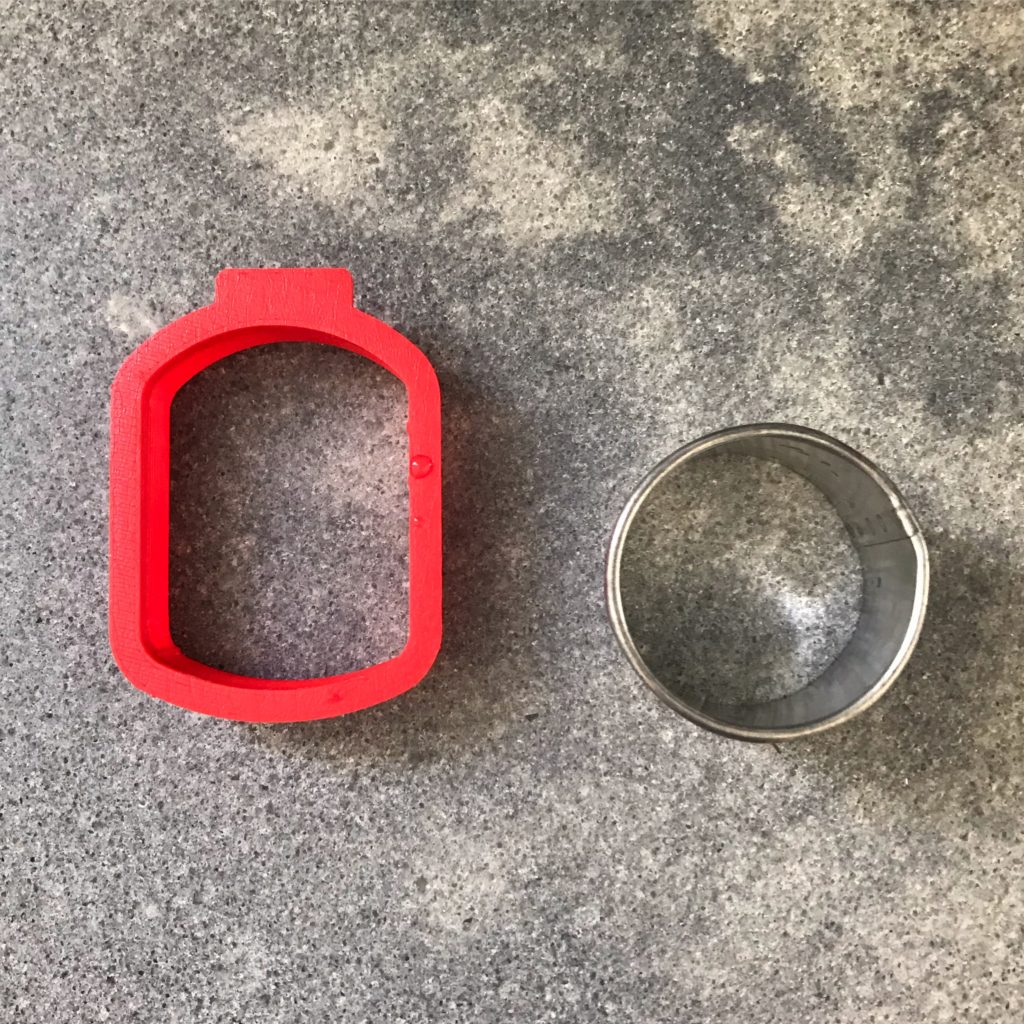
My kids love sushi, so they asked me to make some sushi cookies. To make these, I used a Mac stencils cylinder cutter and a circle cutter.
What you’ll need for the sushi cookies
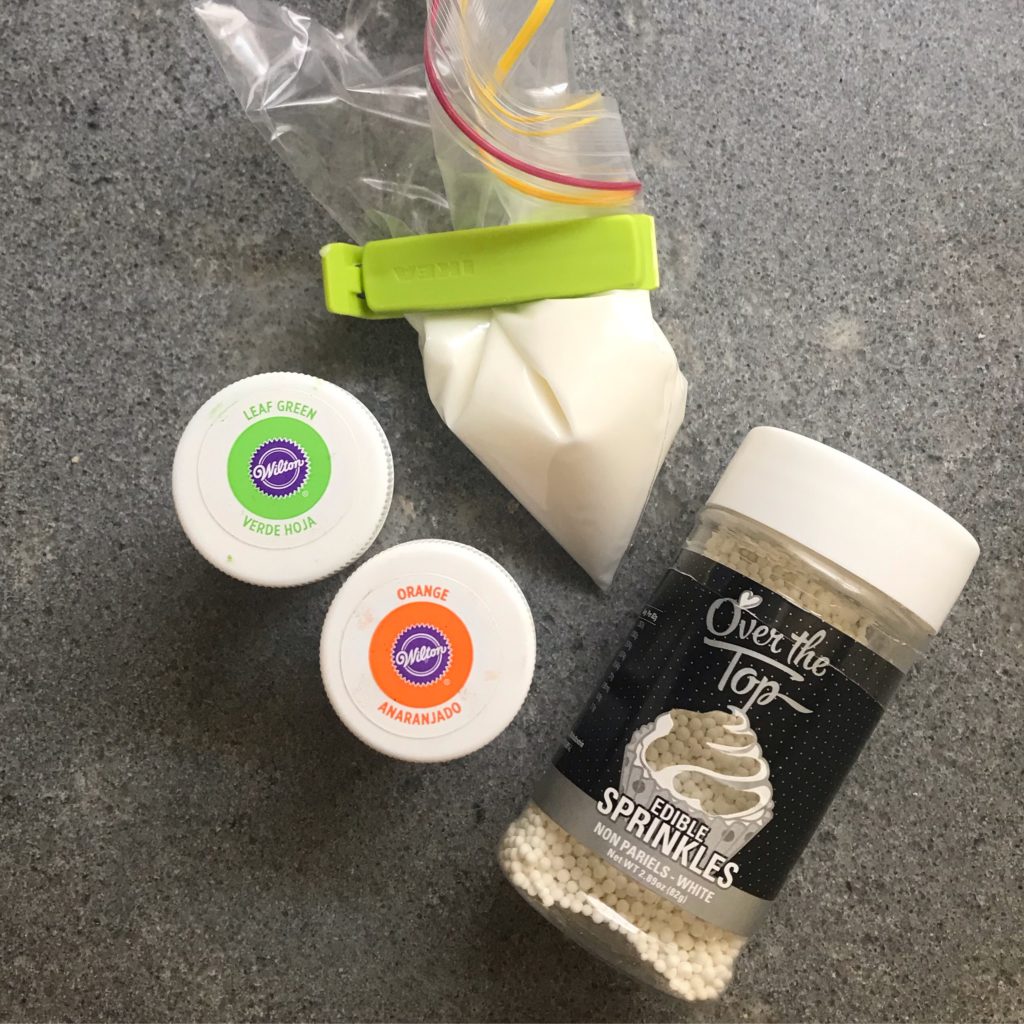
EDIBLES
- Cookie dough
- Royal icing
- Food colouring (I use Wilton gels)
- Edible paint
- White sprinkles
TOOLS
- Toothpick
- Cookie cutters
- Paintbrush
- Icing bags (I use ziplock bags and clips)
- Pencil
- Baking paper
- Paper
Instructions
1. I drew the sushi on a piece of paper using the cutters as stencils so I could design what was going to go inside the sushi.
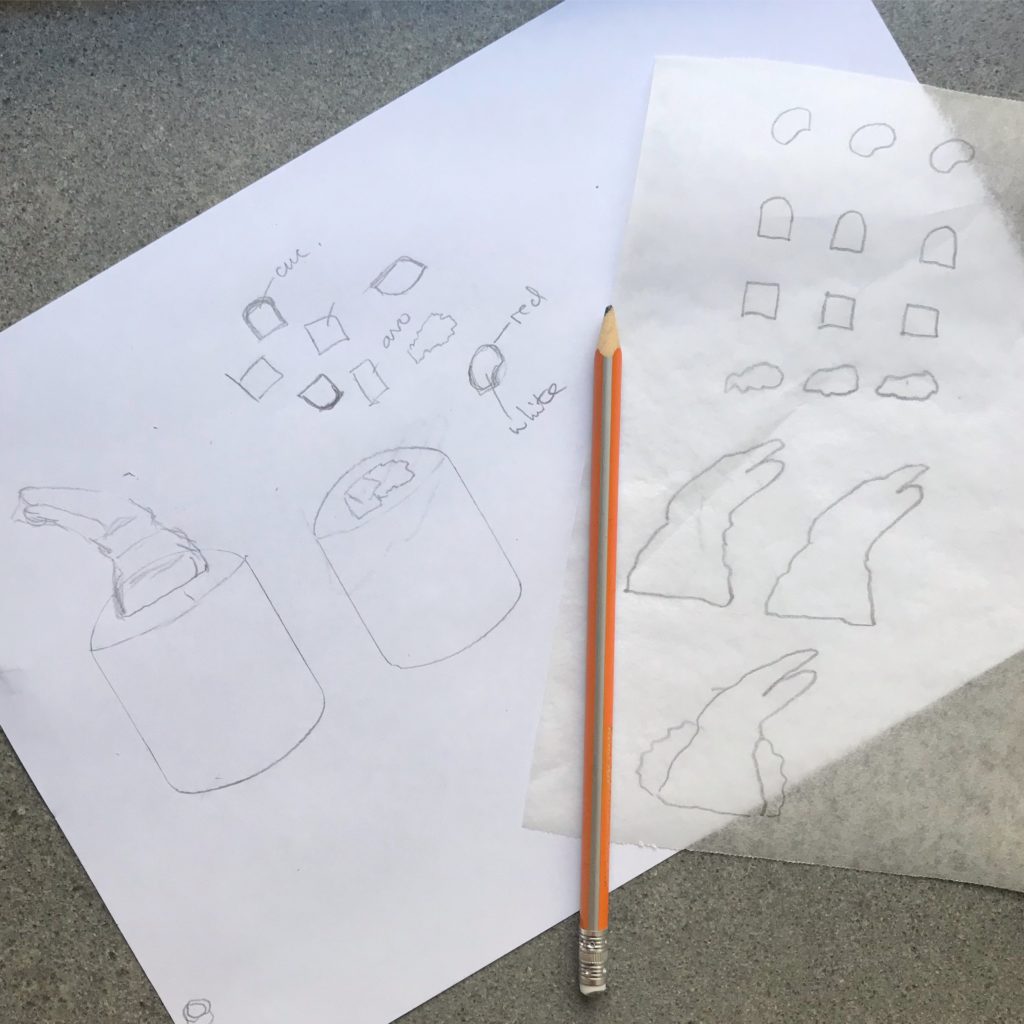
2. I transferred this onto baking paper, as you are using the non-pencil side you may need to draw it backwards first. I made up some icing into a toothpaste consistency, using orange and green food colours and deposited it into icing bags.
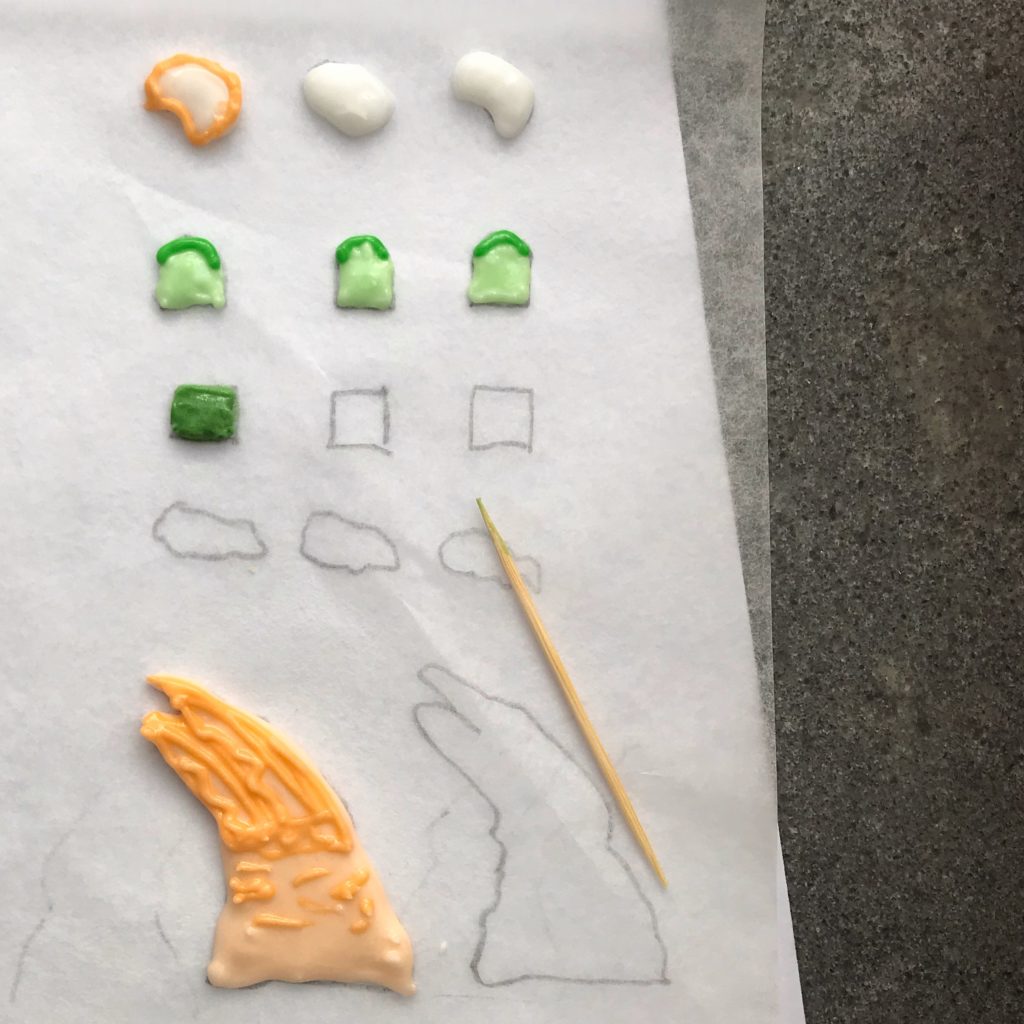
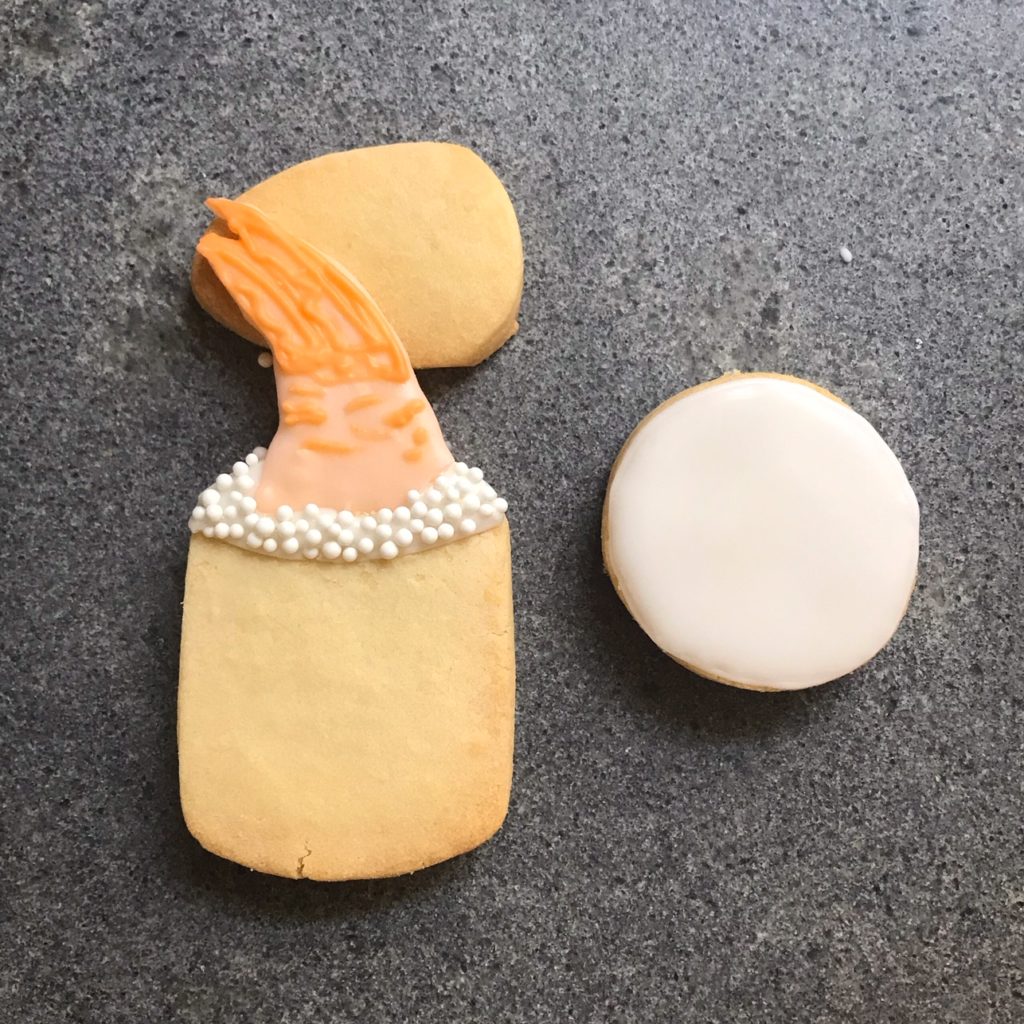
3. I piped my colours onto the non-pencil side of the baking paper to make cucumber, avocado, crab stick and a tempura prawn. These will need to dry at least overnight.
4. Bake some cookies and while they are cooling makeup two bags of white icing, one a thicker toothpaste consistency for outlining and a thinner shampoo consistency for flooding. When they are cool, outline the circle cookie and the top of the cylinder cookie.

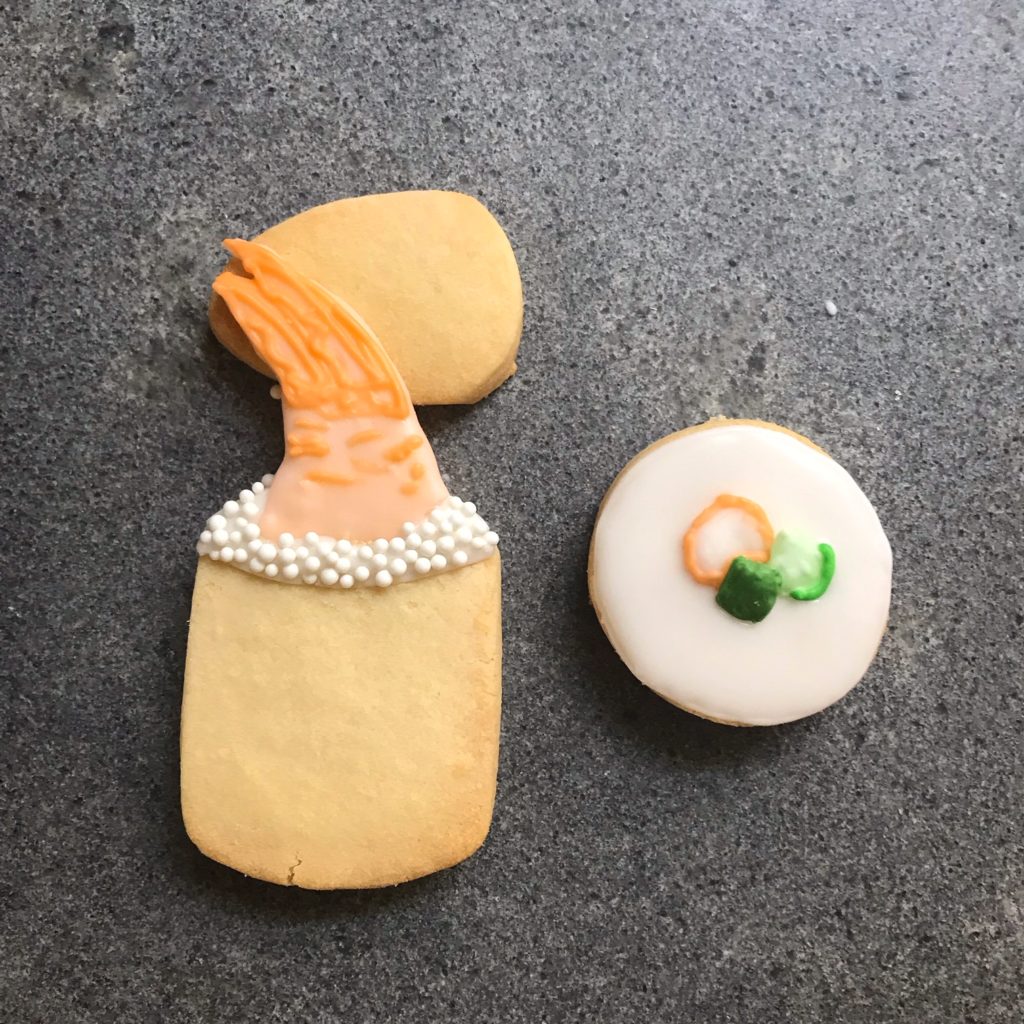
5. Fill in the outlined areas with flooding icing. Add your prawn decoration to the top of the cylinder using a spare cookie to hold it in place until it dries, covering the spare icing with white sprinkles.
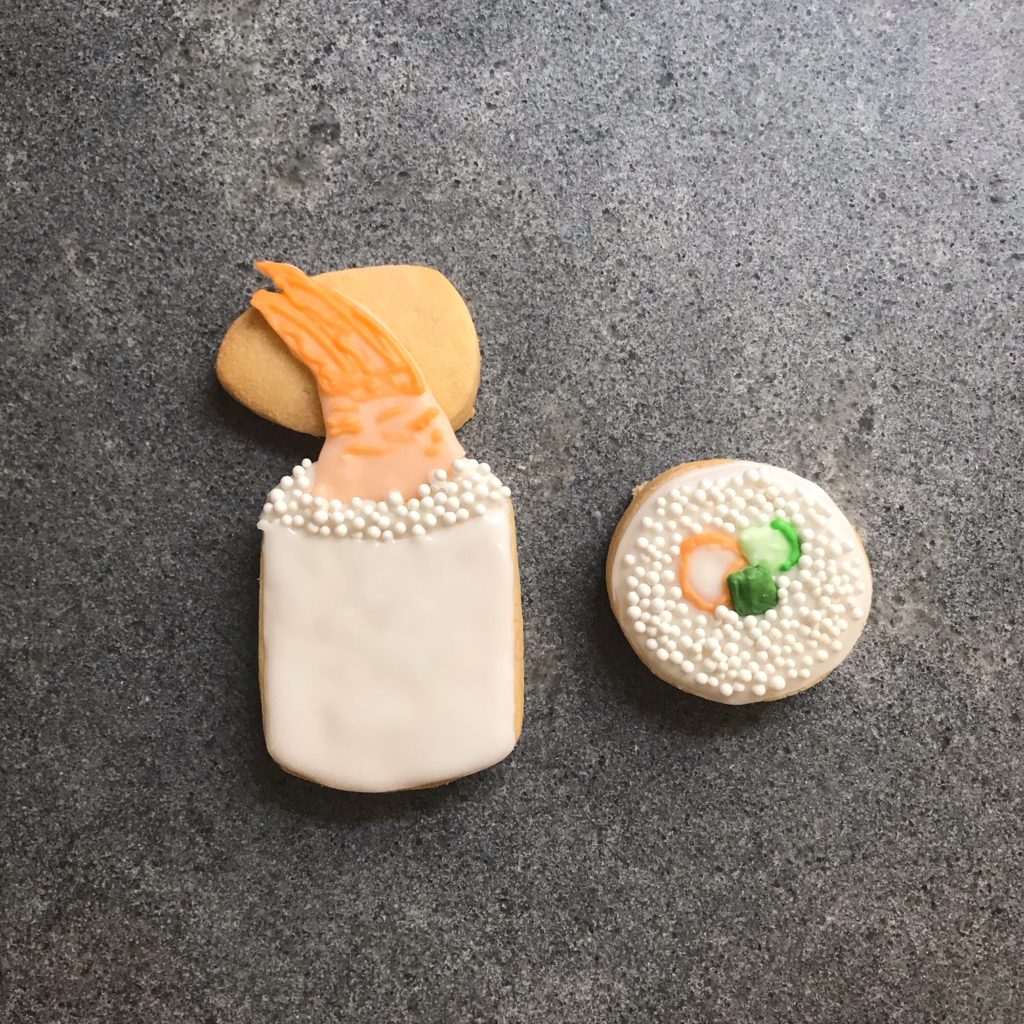
6. Add your icing decorations to the circle cookie, covering the rest of the icing with sprinkles.
7. Flood the bottom of the cylinder with icing and allow to totally dry.
8. Once dry you can paint the seaweed details with an edible black paint
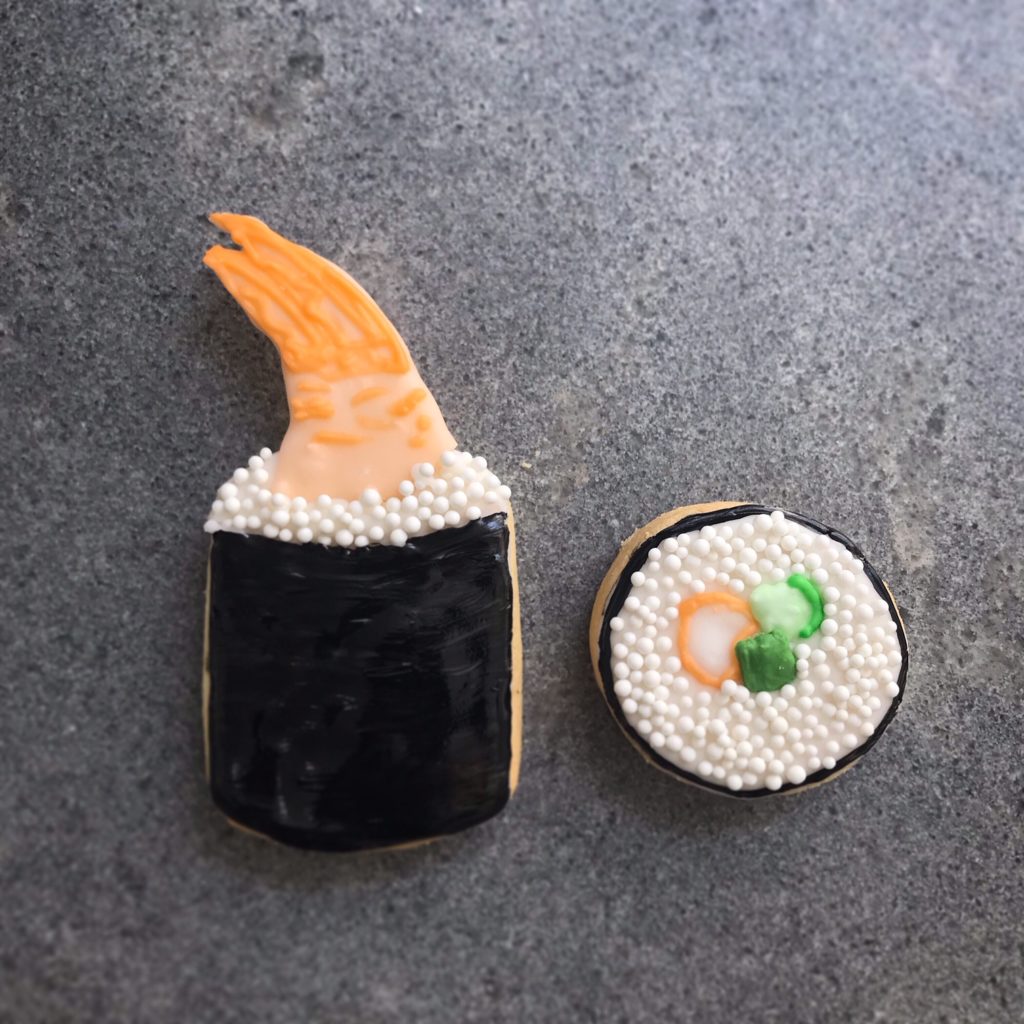
Voila! Sushi Cookies!
Don’t forget to follow The Party Project on Instagram.


Comments are closed.